Create a Mosaic in HTML and CSS
March 20, 2019
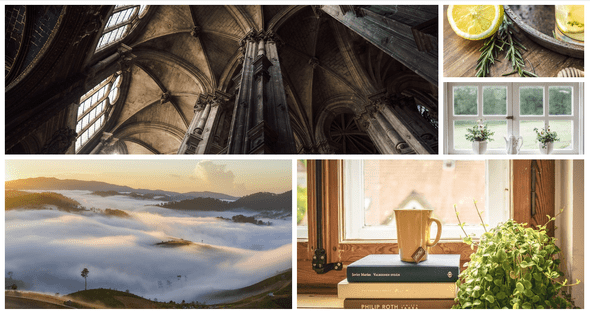
Click on the image to view the screen cast.
Here is the accompanying code.
<!DOCTYPE html>
<html>
<head>
	<meta charset="utf-8" />
	<meta http-equiv="X-UA-Compatible" content="IE=edge">
	<title>Mosaic</title>
	<meta name="viewport" content="width=device-width, initial-scale=1">
	<style>
		.container {
			display: grid;
			grid-gap: 10px;
			max-width: 1200px;
			margin:auto;
			grid-template-columns: repeat(4, 1fr);
			grid-template-rows: repeat(4,minmax(10px, 150px));
		}
		.image1 {
			grid-column: 1/4;
			grid-row: 1/3;
			background-image: url(img1.jpg)

		}
		.image2 {
			grid-column: 1/3;
			grid-row: 3/5;
			background-image: url(img2.jpg)
		}
		.image3 {
			grid-column: 3/5;
			grid-row: 3/5;
			background-image: url(img3.jpg)

		}
		.image4 {
			grid-column: 4/5;
			grid-row: 1/2;
			background-image: url(img4.jpg)
		}
		.image5 {
			grid-column: 4/5;
			grid-row: 2/3;
			background-image: url(img5.jpg)
		}
		/* Use this if you want the shrinking image effect */
		/* [class^="image"] > img {
			width: 100%;
			height: 100%;
			object-fit: cover;
		} */
		[class^="image"] {
			overflow: hidden;
			position: relative;
			background-size: cover;
			background-position: left center;
			background-repeat: no-repeat;
		}
		@media screen and (max-width: 600px){
			.container{
					display: block;
			}
			[class^="image"] {
					margin-bottom: 1rem;
					height: 200px;
			}
		}
	</style>
</head>
<body>
	<div class="container">
		<div class="image1">
		</div>
		<div class="image2">
		</div>
		<div class="image3">
		</div>
		<div class="image4">
		</div>
		<div class="image5">
		</div>
	</div>
</body>
</html>
Written by David Yu who loves to build things in code.You should checkout our facebook for latest events and news